To sell a house in the tech-driven world of today’s generation, you need to be serious about your marketing strategies.
High-quality photographs have the ability to capture the consumer's attention and make them stop scrolling through their timeline. This is important, especially today when more than 90% of buyers start their real estate search online. the National Association of Realtors reported that homebuyers rated viewing the pictures as the feature they use most when browsing online for a home. This is why real estate photography is so important.
Bad quality photos, or none at all, can make or break a potential buyer’s perception of your home and if it is the fit for them. If your photos aren’t up to quality, it is hard for a potential buyer to picture themselves in your home-- and In the generation of instant gratification and short attention spans, your photos need to stand out amongst the others.
If you are trying to take listing photos on your own, continue reading for some beginner tips on how to make your home look its best for potential buyers.
Do's of Taking Listing Photos
- Invest in a decent camera
As good as phones are getting with their cameras, it is not a reliable way to shoot your home. A simple DSLR camera body with the ability to interchange lenses is ideal, but a smaller point and shoot with five megapixels or more will get the job done as well.
- Pick the best time of day to shoot
Weather-- and more importantly sunlight, can be unpredictable. Although shots at twilight or sunset are tempting, they are difficult for the first time photographer to master because of the rapidly changing lighting conditions which call for frequent changes of settings in your camera. The best option is the time of morning or afternoon when the sun is facing your home. This way, everything is brightly lit and your photos are consistent with their brightness and shadow levels across the board.
.png)
Credit: StagingTheNest.com
- Take time to pay attention to the smaller details
When taking real estate photos, distractions like trash cans, garden hoses, cars, etc. on the front of your property, or toys and refrigerator magnets on the inside can take away the initial grab of the house and the attention of the viewer. It is important that you make sure you photograph only what you want the viewer to see so you can be sure their attention never wavers. Organizing your home by taking away the personal artifacts and leaving the important furniture can make a big difference in allowing the viewer to imagine themselves or their family in your home because they are focused on the room, rather than the fine details inside of it.
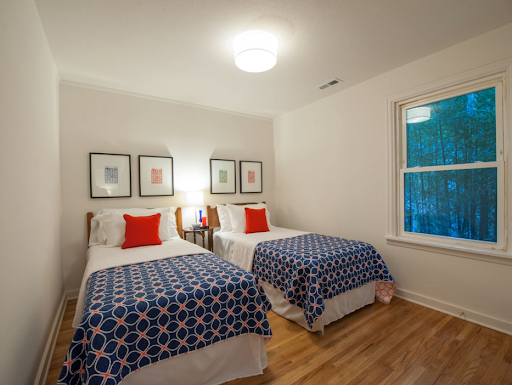
- Use home staging strategies to make your home appear larger
Putting larger items in the front of the photo can make your room appear smaller, while putting them in the back of the photo makes the room appear larger. Adding mirrors to your home design can create the illusion of space, while subliminally showing the buyer how they can see themselves in your home when they catch a glimpse of themselves in the mirror. Using a professional steamer on your sheets can make a big difference in making your home look sleek and professional rather than washed up and lived in. These are just a few tips to not only bring out the best in your home, but also plant the seed in your buyers head that this is the home for them.
Credit: Spade and Archer Design Agency
Don'ts of Taking Listing Photos:
- Be creative in the staging techniques, not the photography itself
Zooming in on specific attributes or experimenting with odd angles that are too low or too high can distort the look of your house and portray it to be something its not. It is best to keep the camera at chest height to get a straight on view of your home that is accurate. If you can, invest in a wide angle lens so you can cover the most surface area without having to worry about not capturing everything in the room because you are cramped in a space or limited by your lenses capabilities.
- While you should improve your photos in post-production, don’t rely on it.
Things like upping the clarity and the shadows in your photos to show off as much as you can are great tools, but you shouldn’t be taking a sub-par photo with the expectation that you will work wonders in post-production if you are not a pro. For those who are starting out, you want to be satisfied with the look of your photo before you enhance it further afterwards.
- Don’t cover up your home’s natural light
If your home has great views, show it off! And, opening up blinds, curtains, etc. can let in natural light and illuminate everything inside. If the blinds are closed, your home may risk looking gloomy and dark. However, you should turn off anything that moves and could become blurry like a ceiling fan or the images on a TV.
- Don’t overwhelm the buyer with too many photos
While it may be tempting to photograph every little detail to make the buyer feel like they are really there, what this is really doing is overwhelming them and/or causing them to lose their attention because they have so many photos to go through. Instead, find that sweet spot by making sure they are able to get an idea of the layout and features through listing photos but are still intrigued enough to come see the home for themselves.
Now that you know the importance of a good listing photo, you can grab your camera, make your home look the best it can be, and prevent the buyer from scrolling past your listing and missing a potential purchase.